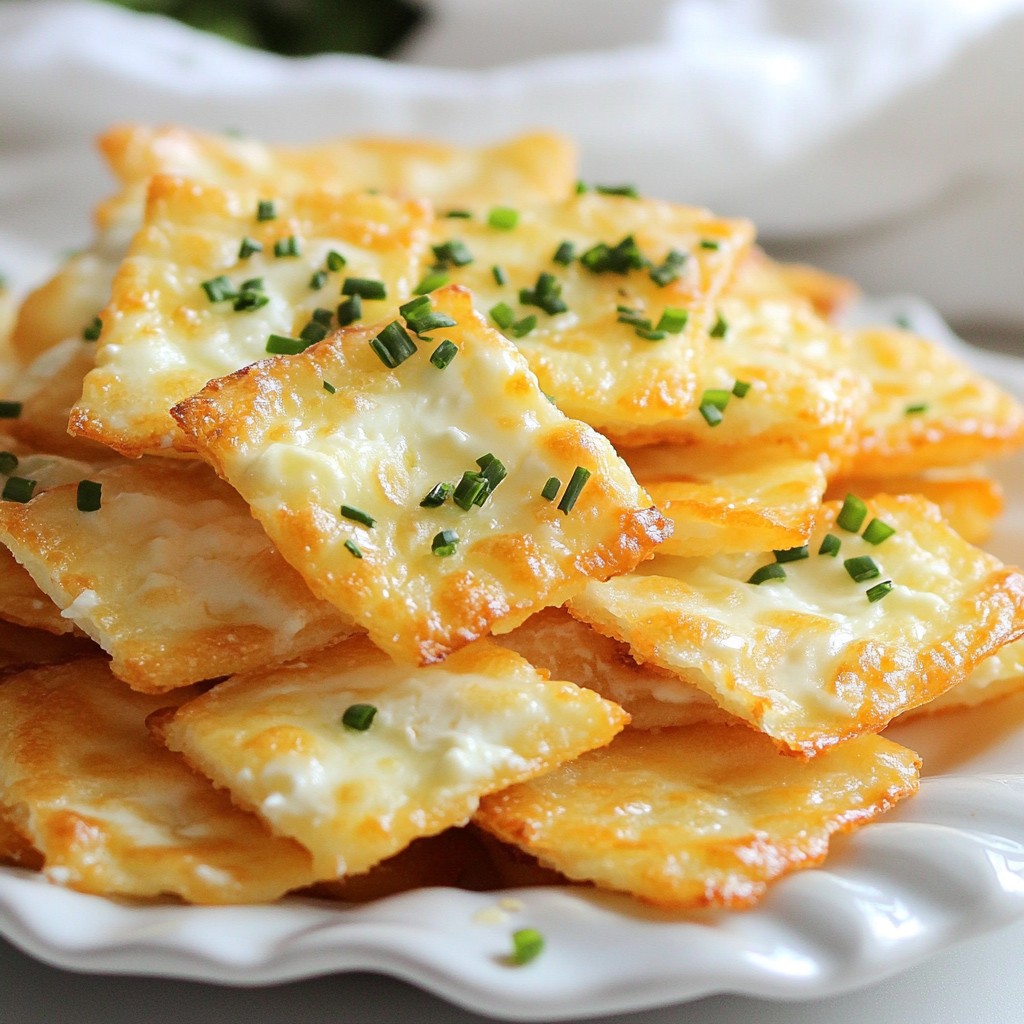
Get ready to cast a delicious spell this Halloween with Cheesy Witch Hat Crescents! These spooky treats are easy to make and perfect for your Halloween festivities. Featuring flaky crescent roll dough filled with gooey cheese, they’re sure to impress your friends and family. In this guide, I’ll walk you through the ingredients and steps to create these fun witch hats. Let’s get started on your festive kitchen adventure!
Why I Love This Recipe
- Fun and Festive: These cheesy witch hat crescents are perfect for Halloween gatherings, adding a whimsical touch to your party spread.
- Quick and Easy: With just 15 minutes of prep time, you can whip up these delicious treats in no time, making them a fantastic last-minute snack.
- Customizable Filling: You can easily switch up the cheese or add extra ingredients like herbs or spices to suit your taste preferences.
- Kid-Friendly: Kids love both eating and helping to make these crescent rolls, making it a fun family activity during the spooky season.
Ingredients
List of Required Ingredients
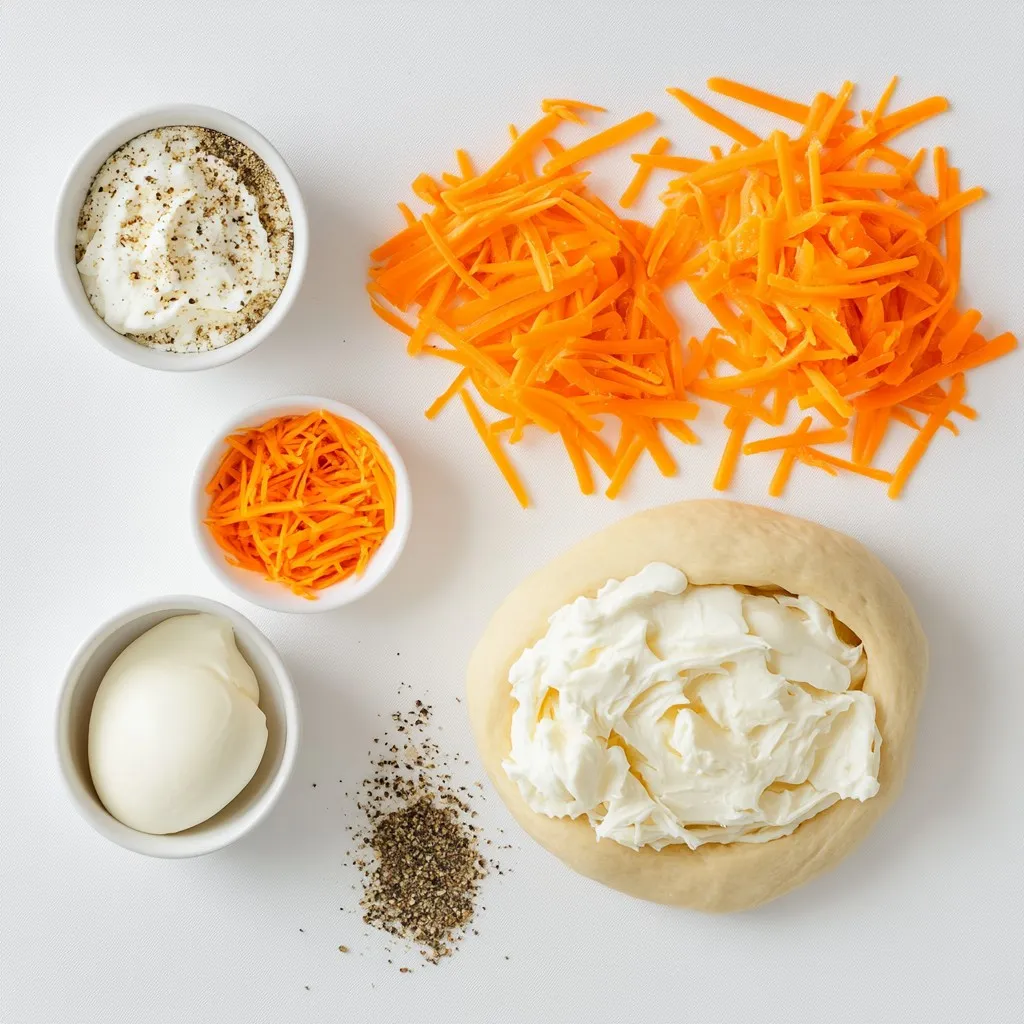
To make Cheesy Witch Hat Crescents, you need the following items:
– 1 can of crescent roll dough
– 1 cup shredded mozzarella cheese
– 1/2 cup shredded cheddar cheese
– 1/4 cup cream cheese, softened
– 1/2 teaspoon garlic powder
– 1/2 teaspoon dried oregano
– 1/4 teaspoon black pepper
– 1 egg, beaten (for egg wash)
– Cooking spray or parchment paper (for baking)
Ingredient Substitutions
If you want to swap ingredients, consider these options:
– Instead of mozzarella and cheddar, try gouda or pepper jack for more flavor.
– For cream cheese, use ricotta or any soft cheese you like.
– If you need gluten-free options, look for gluten-free crescent dough at your store.
Tips for Ingredient Quality
Choosing quality ingredients makes a big difference:
– Select fresh, high-quality cheese for the best taste.
– Use dough that isn’t expired. Fresh dough rolls easier and bakes better.
– Keep spices fresh. Proper seasoning brings out the flavors in your dish.
Step-by-Step Instructions
Preparing the Oven and Baking Sheet
First, preheat your oven to 375°F (190°C). This step is key to getting a nice bake. While the oven heats, prepare your baking sheet. You can use cooking spray or line it with parchment paper. Both options work well. Greasing helps prevent sticking. Parchment makes cleanup easy. Either way, make sure your baking surface is ready.
Mixing the Cheese Filling
Now, let’s mix the cheese filling. In a bowl, combine the shredded mozzarella, cheddar, and cream cheese. Add the garlic powder, oregano, and black pepper. Stir until everything blends well. You want a smooth texture that holds together. If it feels too thick, add a splash of milk to loosen it. This makes it easier to spread.
Shaping the Crescents
Next, it’s time to shape the crescents. Unroll the crescent roll dough and separate it into triangles. Take a generous tablespoon of the cheese mixture and place it at the wide end of each triangle. Start rolling from the wide end towards the tip. Pinch the edges to seal them tight. To shape the witch hat, craft the top into a point. This creates that classic Halloween look.
Tips & Tricks
Perfecting Your Crescent Rolls
To get that perfect golden-brown finish, keep a close eye on the rolls while baking. Bake them at 375°F (190°C) for about 10 to 12 minutes. The rolls should puff up and turn a nice, deep color. An egg wash is key to achieving that shiny look. Simply brush the tops with the beaten egg before baking. This adds a lovely gloss that makes them look festive!
Decorating Ideas
Garnishing can take your Cheesy Witch Hat Crescents to a new level. You can use fresh herbs like parsley or thyme. They give a pop of color and look like a magical garden. For a themed platter, arrange the crescents around spooky decorations. Think mini pumpkins or edible spiders made from olives. This fun touch will wow your guests!
Troubleshooting Common Issues
If you notice cheese leaking out while baking, don’t worry. Pinch the edges of the dough well before baking. This will help seal the filling inside. If your dough sticks to the baking sheet, use parchment paper or cooking spray. This prevents sticking and makes cleanup easier. Always remember these tips to ensure your crescent rolls turn out perfect every time!
Pro Tips
- Use Fresh Herbs: Adding fresh herbs like basil or thyme to the cheese mixture will enhance the flavor and provide a lovely aroma.
- Perfectly Sealed Edges: Make sure to pinch the edges of the crescent rolls tightly to prevent the cheese from leaking out during baking.
- Experiment with Cheese: Feel free to mix different types of cheese such as gouda or pepper jack for a unique flavor twist.
- Serve Warm: These crescent rolls are best served warm out of the oven for that gooey cheese experience!
Variations
Flavorful Add-Ins
You can make Cheesy Witch Hat Crescents even tastier by adding different cheeses. Here are some ideas:
– Gouda: This cheese adds a rich, smoky flavor.
– Pepper Jack: It brings a spicy kick that kids love.
– Feta: This cheese offers a tangy twist to the filling.
If you want more heat, try adding jalapeños. Chop them finely and mix them into the cheese blend. They add a nice warmth and crunch.
Alternate Shaping Techniques
You don’t have to stick with witch hats! You can shape the dough into other fun Halloween forms. Try these ideas:
– Mummies: Wrap the dough strips around small cheese balls.
– Ghosts: Use a small ball of cheese and cover it with a crescent piece, leaving a bit of cheese showing for the ghost’s face.
For mini crescent rolls, cut the dough into smaller triangles. Use a teaspoon of filling for each. These bite-sized treats are great for little hands!
Dietary Adaptations
If you are looking for vegan options, replace dairy cheese with plant-based cheese. Look for brands that melt well. You can also use cashew cream as a filling base.
For a low-carb version, try using almond flour dough or cauliflower dough. This way, you keep the flavor but cut down on carbs.
Storage Info
Storing Leftovers
To keep your Cheesy Witch Hat Crescents fresh, place them in an airtight container. This method helps maintain their flavor and texture. You can also wrap them in plastic wrap before putting them in a container. Store the leftovers in the fridge for up to three days.
Reheating Instructions
When reheating, the oven works best. Preheat it to 350°F (175°C). Bake the crescents for about 5-7 minutes. This helps keep them crispy. If you use the microwave, heat in short bursts of 15-20 seconds. Be careful, as the microwave can make them soft.
Freezing for Later Use
To freeze your crescents, allow them to cool completely. Then, wrap each one in plastic wrap. Place the wrapped crescents in a freezer-safe container or bag. They can stay in the freezer for up to three months.
When ready to eat, thaw them in the fridge overnight. For reheating, use the oven to restore their crispy texture. Enjoy your spooky treat anytime!
FAQs
What can I use instead of crescent roll dough?
You can use puff pastry for a flakier texture. It works well and has a nice rise. If you want a healthier option, try whole wheat dough. For homemade alternatives, you can make your own dough with flour, butter, and water. This gives you full control over the ingredients.
How long can I store Cheesy Witch Hat Crescents?
These tasty treats last about three days in the fridge. Make sure to store them in an airtight container. If you want to keep them longer, freeze them. They can stay fresh for up to two months in the freezer.
Can I prepare the filling in advance?
Yes, you can prep the filling ahead of time. Mix the cheeses and spices, then store it in the fridge. An airtight container works best. Just remember to use it within three days for the best taste.
You learned how to make Cheesy Witch Hat Crescents with easy steps and tips. We covered essential ingredients, substitutions, and the best practices for quality. I shared how to shape your crescents and offered ideas for creative decorations. You now see how to store leftovers and reheat them well.
Remember, this treat is fun for any Halloween event. Don’t be afraid to try variations that suit your taste. With these skills, you’ll impress your guests and enjoy tasty snacks all season lon