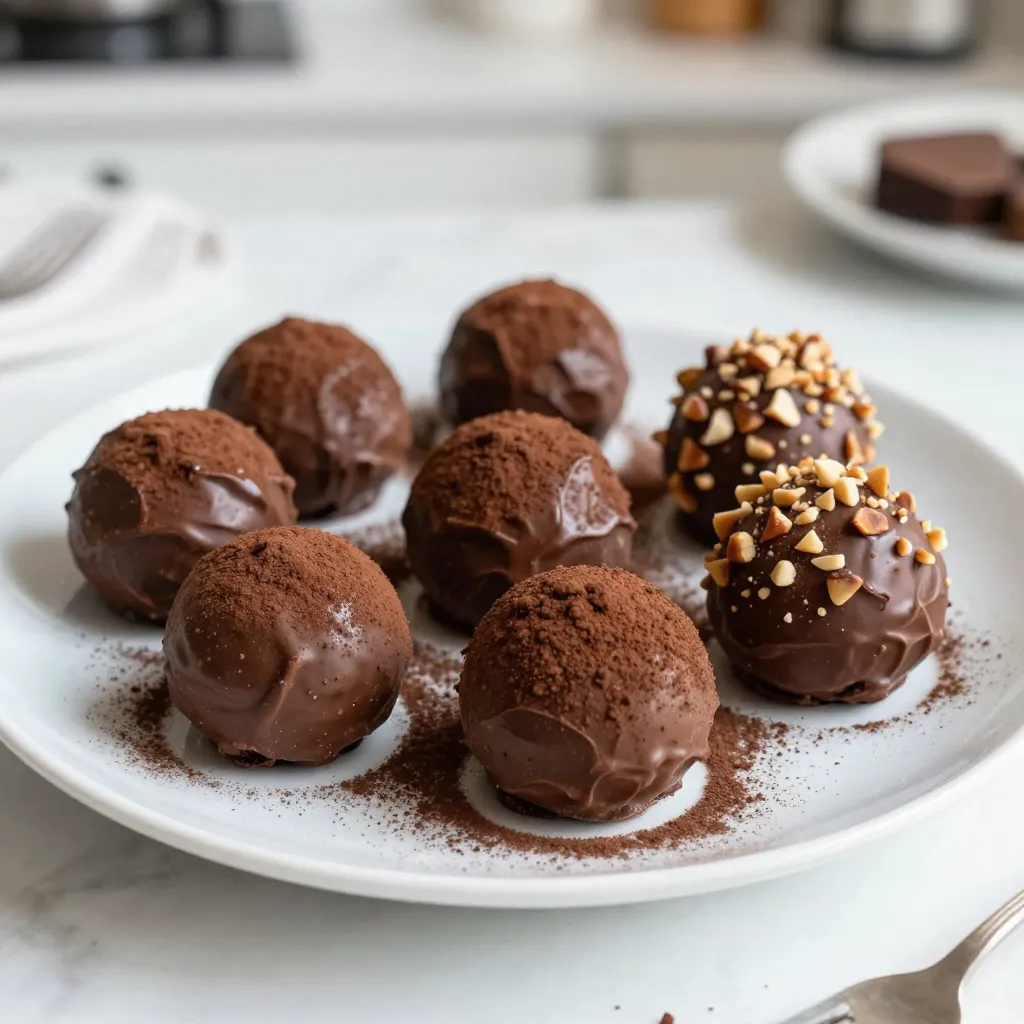
Looking to impress your friends with a sweet homemade treat? These Cream Cheese Chocolate Truffles are rich, creamy, and oh-so-decadent! In this guide, I’ll walk you through the easy steps to create these chocolate delights. You’ll discover essential ingredients, useful tips, and fun variations to make them uniquely yours. Get ready to indulge in a delightful experience that will keep everyone asking for more. Let’s dive in!
Why I Love This Recipe
- Decadent Flavor: These truffles combine rich chocolate with the creamy texture of cream cheese, creating an indulgent treat that’s hard to resist.
- Easy to Make: The straightforward steps make this recipe accessible to both beginners and seasoned bakers, ensuring delicious results without fuss.
- Perfect for Gifting: With their beautiful presentation and delightful taste, these truffles make a thoughtful gift for any occasion.
- Customizable Coatings: Rolling the truffles in cocoa powder or crushed nuts allows for personal preference, making each batch uniquely yours.
Ingredients
Main Ingredients
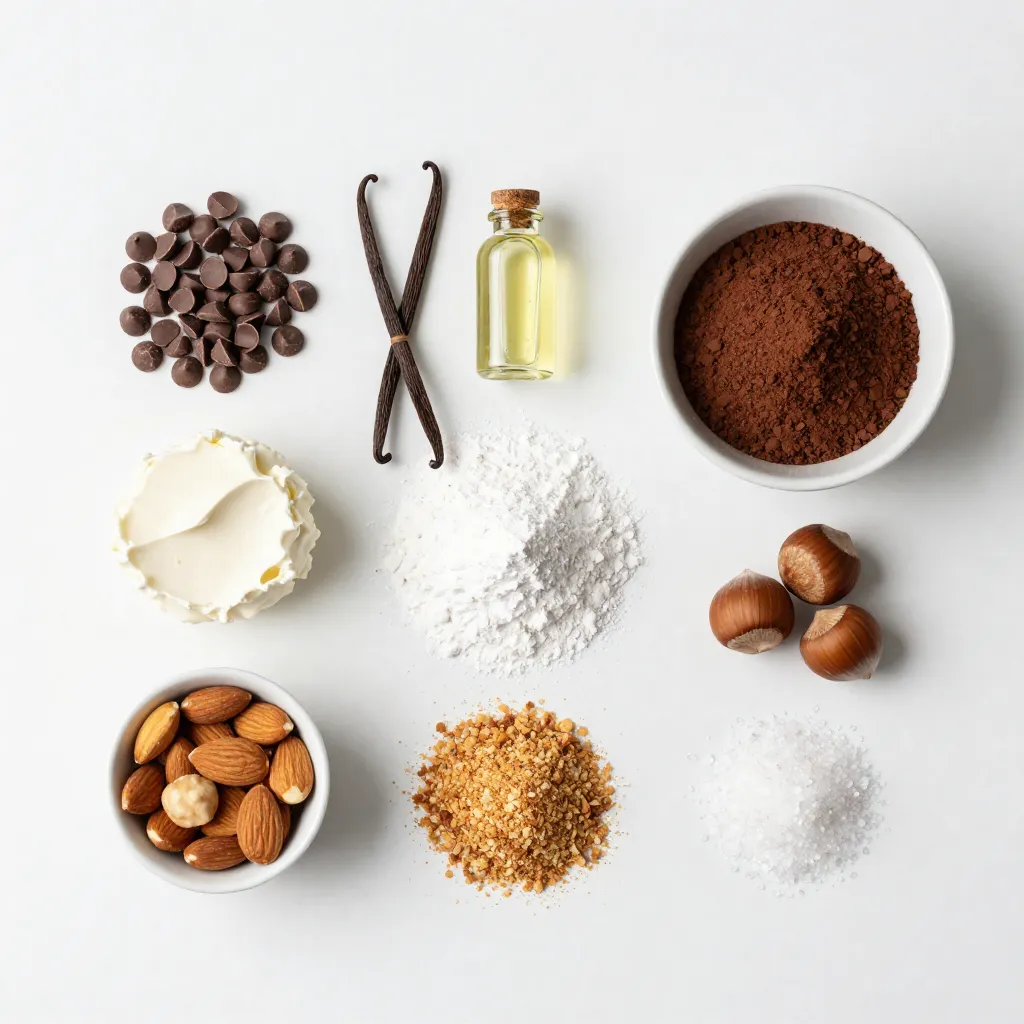
To make these rich cream cheese chocolate truffles, you need:
– 8 oz cream cheese, softened
– 12 oz semi-sweet chocolate chips
– 1 tsp vanilla extract
– 1 cup powdered sugar
– Pinch of sea salt
These ingredients create a smooth and creamy base. The cream cheese adds richness while the chocolate provides that deep cocoa flavor. The powdered sugar sweetens the mix, making each bite melt in your mouth.
Optional Toppings
You can enhance your truffles with these toppings:
– 1/2 cup cocoa powder (for rolling)
– 1/2 cup crushed nuts (almonds or hazelnuts)
Rolling the truffles in cocoa powder gives them a classic look. Crushed nuts add a crunchy texture and nutty flavor that many enjoy. Feel free to mix and match these toppings to find your favorite.
Equipment Needed
Here’s what you need to prepare these truffles:
– Microwave-safe bowl
– Electric mixer
– Large mixing bowl
– Small cookie scoop or spoon
– Shallow bowls for toppings
– Parchment paper
Using the right tools makes the process easier. The microwave-safe bowl helps melt the chocolate evenly, while the mixer ensures a smooth truffle base. Parchment paper keeps your truffles from sticking.
Step-by-Step Instructions
Melting the Chocolate
Start by taking a microwave-safe bowl. Add 12 ounces of semi-sweet chocolate chips. Heat them in the microwave for 30 seconds. After 30 seconds, stir the chocolate. Repeat this until it melts and is smooth. This usually takes about 1 to 2 minutes. Once melted, let it cool for a few minutes. We want it warm, not hot.
Mixing the Cream Cheese
Next, grab a large mixing bowl. Add 8 ounces of softened cream cheese. Use an electric mixer to beat it until creamy. This should take about 2 minutes. You want it smooth and fluffy. Then, pour in the melted chocolate and 1 teaspoon of vanilla extract. Mix well until everything blends together.
Forming and Coating the Truffles
Now, we add the fun part. Gradually mix in 1 cup of powdered sugar. Keep mixing until it’s smooth and creamy. Add a pinch of sea salt to boost the flavor. Cover the bowl with plastic wrap and put it in the fridge for about 30 minutes. This helps the mixture firm up.
Once it’s chilled, scoop out small portions of the mixture. Roll them into balls with your hands. You can use a small cookie scoop for this. Next, prepare two shallow bowls. In one bowl, add ½ cup of cocoa powder. In the other, put ½ cup of crushed nuts, like almonds or hazelnuts. Roll half of the truffles in cocoa powder and the other half in nuts. Place the coated truffles on a parchment-lined baking sheet. Finally, refrigerate them for another 30 minutes to set. Enjoy your creamy chocolate bliss!
Tips & Tricks
Achieving the Perfect Texture
To get that creamy texture, use softened cream cheese. Beat it until smooth. Then, mix in the melted chocolate well. This step is key for a silky truffle. If the mix feels too soft, chill it longer. A firm mixture makes it easier to roll.
Flavor Enhancements
Add a pinch of sea salt to boost the chocolate flavor. You can also mix in a splash of your favorite liqueur for a unique twist. Try orange or coffee flavors for a fun twist. Keep tasting as you go to find your perfect blend.
Presentation Ideas
For a stunning look, arrange truffles on a pretty plate. Dust them with cocoa powder before serving. Place them in small paper cups for gifts. This adds a personal touch and makes them special. You could also use colorful sprinkles to brighten up the tray.
Pro Tips
- Chill the Mixture: Ensure the truffle mixture is firm enough before rolling to prevent sticking to your hands.
- Flavor Variations: Experiment with different extracts like almond or peppermint for unique flavor profiles.
- Coating Options: Try rolling the truffles in shredded coconut or crushed cookies for added texture and flavor.
- Storage Tips: Store the truffles in an airtight container in the refrigerator for up to a week to maintain freshness.
Variations
Different Flavor Combinations
You can mix in flavors to change your truffles. Try adding 1 tablespoon of almond extract for a nutty twist. Or, add a splash of orange zest for a refreshing taste. If you like coffee, mix in 1 tablespoon of espresso powder. Want something rich? Use dark chocolate instead of semi-sweet. Each flavor brings a fun new spin to your truffles.
Alternative Coatings
The way you coat your truffles can change their look and taste. Besides cocoa powder, you can use shredded coconut for a tropical flair. Crushed pretzels make a great salty-sweet combo. You can also roll them in sprinkles for a festive touch. For a crunchy texture, try finely chopped nuts or candy. Each option adds a unique character to your truffles.
Dietary Modifications
You can easily make these truffles fit your diet. For a dairy-free option, use vegan cream cheese and dark chocolate. If you need a lower-sugar treat, use a sugar substitute in your recipe. You can also make them gluten-free by ensuring your coatings are safe. These simple changes let everyone enjoy these tasty treats without worry.
Storage Info
Refrigeration Tips
To keep your cream cheese chocolate truffles fresh, store them in the fridge. Use an airtight container to avoid moisture. They will stay good for about one week when stored properly. Before serving, let them sit at room temperature for a few minutes. This helps bring out their rich flavor and creamy texture.
Freezing Truffles
You can freeze these truffles for later. First, place them on a baking sheet in a single layer. Freeze them for about an hour until firm. Then, transfer the truffles into a freezer-safe bag or container. They will keep well for up to three months. When you want to enjoy them, thaw in the fridge overnight.
Best Serving Practices
Serve these truffles chilled for the best taste. Arrange them on a pretty plate for a nice touch. You can also dust them with extra cocoa powder before serving. If you want to make them a gift, place them in small paper cups. This adds flair and makes them look special.
FAQs
How long do cream cheese chocolate truffles last?
Cream cheese chocolate truffles can last about one week in the fridge. Store them in an airtight container to keep them fresh. If you notice any change in smell or texture, it’s best to toss them out.
Can I make these truffles ahead of time?
Yes, you can make these truffles ahead of time. They work great for parties or gifts. Just follow the recipe and store them in the fridge. You can prepare them up to two days in advance.
What can I substitute for cream cheese?
You can use mascarpone or Greek yogurt as a substitute for cream cheese. Both options will give you a creamy texture. They will also add a slightly different taste, which can be fun to try!
Making cream cheese chocolate truffles is fun and easy. We covered key ingredients, step-by-step instructions, and helpful tips. You can also explore flavor variations and learn how to store them. Remember, these truffles are great for any occasion, and you can customize them to fit your taste. Enjoy creating your own treats and impressing friends and family. Keep these tips in mind, and have fun in the kitche