Looking for a fun and tasty breakfast idea? Let me introduce you to Hash Brown Egg Nests! These nests are crispy, cheesy, and super easy to make. Whether you’re hosting brunch or just want a hearty start to your day, this dish has it all. Stick around as I share the ingredients, step-by-step instructions, and tips to perfect your Hash Brown Egg Nests for a morning everyone will love!
Why I Love This Recipe
- Crispy Delight: The hash brown nests provide a perfect crispy texture that pairs beautifully with the creamy eggs.
- Customizable: You can easily modify the recipe with different cheeses or add-ins like vegetables or meats to suit your taste.
- Quick and Easy: With a total cooking time of just 35 minutes, this dish is perfect for a fast breakfast or brunch option.
- Visual Appeal: The nests look adorable on the plate, making them a hit for gatherings or special occasions.
Ingredients
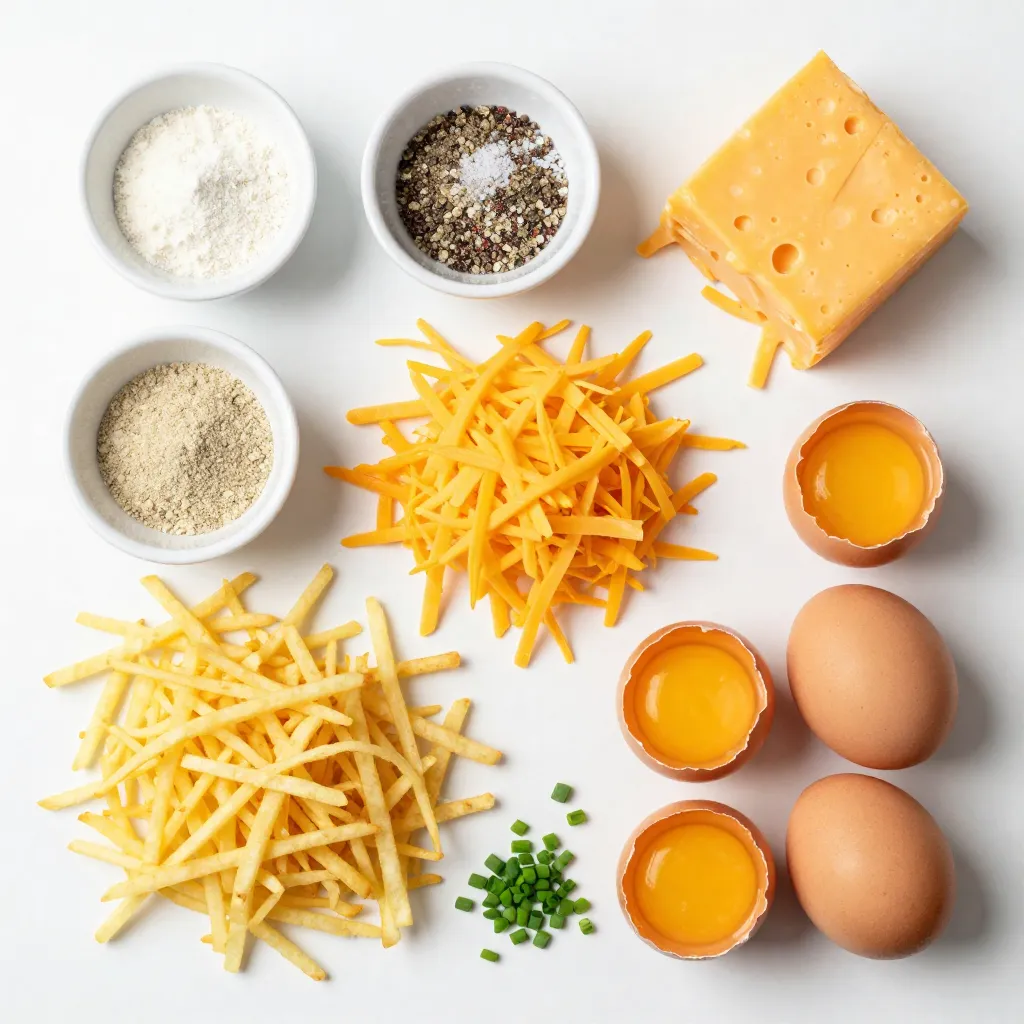
List of Ingredients
– Quantity of Hash Browns
– You need 2 cups of frozen shredded hash browns. Make sure they are thawed.
– Seasoning Details
– Use 1 teaspoon of garlic powder.
– Add 1 teaspoon of onion powder.
– Season with salt and pepper to taste.
– Cheese Selection
– Choose 1/2 cup of shredded cheddar cheese for a rich flavor.
These ingredients work well together. The hash browns give a nice crunch. The garlic and onion powders add depth. The cheddar cheese melts beautifully over the eggs. Each bite is a delight.
Step-by-Step Instructions
Preparation Steps
– Preheat the Oven: Start by preheating your oven to 425°F (220°C). This helps cook the nests evenly.
– Mixing Ingredients: In a bowl, combine 2 cups of thawed hash browns, 1 teaspoon of garlic powder, 1 teaspoon of onion powder, salt, and pepper. Stir well until everything is mixed.
– Forming the Hash Brown Nests: Grease a muffin tin with cooking spray or olive oil. Take about 1/4 cup of the hash brown mix and press it into each muffin cup. Make sure to pack it tightly against the bottom and sides.
Baking Steps
– Initial Bake for Nest Crispiness: Place the muffin tin in the oven. Bake for 15-20 minutes until the nests turn golden brown and crispy.
– Adding Cheese and Eggs: Carefully take the muffin tin out of the oven. Sprinkle about 1 tablespoon of shredded cheddar cheese into each nest. Then, crack an egg into each one, being careful not to break the yolk.
– Final Baking to Perfection: Put the muffin tin back in the oven. Bake for another 10-12 minutes. The egg whites should be set while the yolks stay slightly runny, or to your liking.
Tips & Tricks
Cooking Tips
Achieving Perfectly Crispy Nests
To get crispy nests, use thawed hash browns. Press them tightly into the muffin tin. Bake them until they are golden brown. This will help them hold their shape. If they are too loose, they may fall apart.
Ideal Egg Cooking Timing
Bake the nests for about 15-20 minutes first. Once you add the eggs, bake for 10-12 more minutes. This keeps the yolks runny, but you can cook longer if you like firmer yolks. Keep an eye on them to avoid overcooking.
Ensuring Easy Removal from Muffin Tin
Grease the muffin tin well with cooking spray or olive oil. This helps the nests slide out easily. Let them cool for a couple of minutes after baking. Use a small spatula to gently lift them out.
Presentation Suggestions
Garnishing Ideas
Chopped fresh chives add a nice touch. You can also sprinkle some extra cheese on top. For a pop of color, add diced tomatoes or bell peppers. These bright colors make the dish look more inviting.
Serving Accompaniments
Serve the nests with a side of fresh fruit. A light salad can also work well. You can pair them with hot sauce if you like some spice. These sides will balance the dish and make it more filling.
Pro Tips
- Use Fresh Hash Browns: For the best texture and flavor, consider using fresh grated potatoes instead of frozen. This will enhance the crispiness of your nests.
- Experiment with Cheese: While cheddar is delicious, feel free to mix in other cheeses like mozzarella or feta for a unique flavor profile.
- Customize Your Eggs: Adjust the doneness of your eggs to your preference. If you like them fully cooked, leave them in the oven a bit longer.
- Make Ahead: You can prepare the hash brown nests in advance and store them in the fridge. Just add the cheese and eggs before baking for a quick breakfast!
Variations
Ingredient Swaps
Different Cheese Options
You can switch the cheddar cheese for other types. Try mozzarella for a milder taste. Feta adds a tangy kick. Pepper jack brings heat. Experiment with your favorite cheese to find the best flavor.
Adding Vegetables or Proteins
Take your hash brown nests to the next level! Mix in veggies like spinach, peppers, or onions. Cook them slightly before adding to the nests. For extra protein, add cooked bacon or sausage. These swaps boost nutrition and taste.
Cooking Method Alternatives
Air Fryer Instructions
If you want to use an air fryer, it’s simple! Preheat your air fryer to 400°F (200°C). Form the nests just like in the oven method. Air fry for about 10-15 minutes. Check them for crispiness before adding cheese and eggs.
Skillet Method Overview
You can also cook these on the stove. Heat a non-stick skillet over medium heat. Form small nests in the skillet and cook for about 5-7 minutes. Add cheese and eggs, cover, and cook until the eggs set. This method gives you a nice crispy bottom.
Storage Info
Leftover Storage
Refrigeration Guidelines
Store leftover Hash Brown Egg Nests in an airtight container. Keep them in the fridge. They stay fresh for up to three days. Make sure they cool down before you store them. This helps avoid sogginess.
Freezing Instructions
You can freeze these nests, too! Place them in a single layer on a baking sheet. Freeze until solid, then transfer them to a freezer-safe bag. They last for up to two months. To use, thaw in the fridge overnight before reheating.
Reheating Suggestions
Best Methods to Reheat for Best Texture
For the best results, reheat in the oven. Set it to 350°F (175°C). Place the nests on a baking sheet. Heat for about 10-15 minutes. This keeps them crispy. You can also use a microwave, but they may not be as crunchy.
Serving Leftovers
Serve leftovers warm. Add fresh chives on top for color and flavor. Pair with a side salad or fresh fruit for a balanced meal. Enjoy your tasty breakfast again!
FAQs
Common Questions
How do I make Hash Brown Egg Nests gluten-free?
To make Hash Brown Egg Nests gluten-free, use frozen shredded hash browns that are labeled gluten-free. Most brands are naturally gluten-free, but double-check the packaging. Also, avoid any added seasonings that may contain gluten. You can use simple spices like salt, pepper, garlic powder, and onion powder.
Can I make this dish ahead of time?
Yes, you can prepare Hash Brown Egg Nests ahead of time. Form the nests and bake them until crispy. Then, let them cool and store them in the fridge. When you’re ready to eat, crack the eggs in and bake again. This way, you save time during busy mornings.
What can I serve with Hash Brown Egg Nests?
Hash Brown Egg Nests pair well with many sides. You can serve them with fresh fruit or a simple salad. For added protein, consider bacon or sausage links. A dollop of sour cream or hot sauce on top adds extra flavor. Enjoy the nests with your favorite beverage, like coffee or juice.
In this guide, we explored making delicious Hash Brown Egg Nests. You learned about key ingredients like hash browns, cheeses, and seasonings. I shared simple steps for mixing, baking, and achieving that perfect crispy texture. Tips on presentation and variations allowed for personal touches. Don’t forget the storage advice for leftovers and reheating methods. Now you have the tools to create a tasty dish that impresses everyone. Enjoy every bite of your creatio