Are you ready to spook up your Halloween party? Mini Skull Pizzas are the eerie yet fun treats everyone will love! With simple ingredients and your creative touch, you can make these tasty delights that are perfect for kids and adults. Let’s dive into the easy steps, unique toppings, and fun variations to make your Halloween unforgettable! Get your apron on, and let’s start creating some deliciously creepy bites!
Why I Love This Recipe
- Fun Presentation: These mini skull pizzas are not only delicious but also a spooky treat that adds a playful element to any Halloween gathering.
- Customizable Toppings: You can easily personalize them with your favorite toppings, making them perfect for both kids and adults.
- Quick and Easy: With a prep time of just 20 minutes, they’re a simple yet impressive dish that can be made in no time.
- Interactive Cooking: This recipe is a fun activity for families or parties, where everyone can create their own spooky masterpieces!
Ingredients
List of Required Ingredients
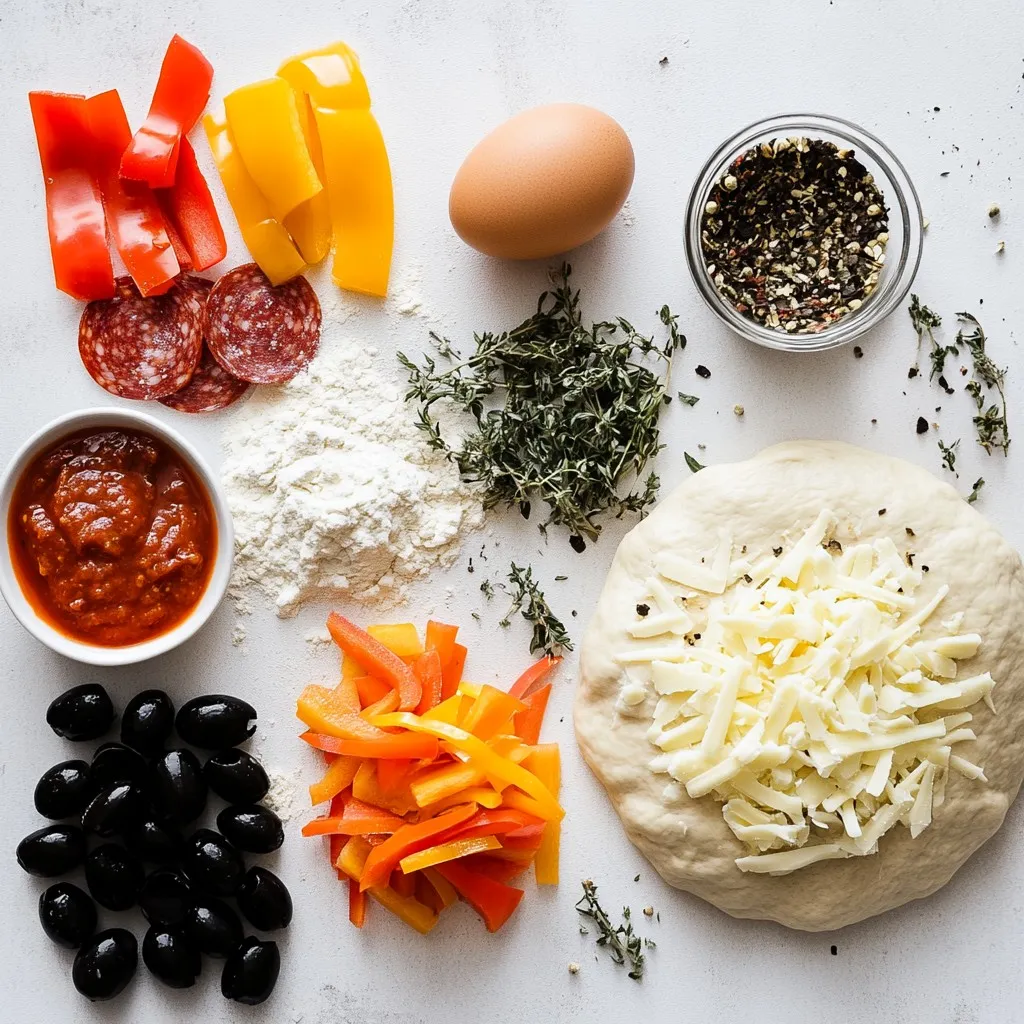
To make mini skull pizzas, gather these key ingredients:
– 1 package of pre-made pizza dough
– 1 cup pizza sauce
– 1 ½ cups shredded mozzarella cheese
– ½ cup sliced black olives
– 1 teaspoon garlic powder
– 1 teaspoon dried oregano
– 1 egg (for egg wash)
– All-purpose flour (for dusting)
Optional Toppings and Substitutes
You can get creative with your toppings! Here are some fun options:
– ¼ cup pepperoni slices
– ¼ cup chopped bell peppers (various colors)
– Fresh basil for garnish
– Other veggies like mushrooms or spinach
These toppings add flavor and color to your skull pizzas. Feel free to mix and match to suit your taste!
Essential Cooking Tools
To make your mini skull pizzas, you will need:
– Large round cookie cutter (about 4 inches)
– Smaller round cookie cutter (about 1 inch)
– Baking sheets
– Parchment paper
– Rolling pin
– Small bowl for the egg wash
Having these tools ready will help you create your spooky treats with ease!
Step-by-Step Instructions
How to Preheat and Prepare Baking Sheets
First, set your oven to 450°F (230°C) to heat up. While it warms, grab two baking sheets. Line them with parchment paper. This helps keep the pizzas from sticking. It also makes for easy cleanup.
Rolling Out and Shaping the Dough
Next, take your pre-made pizza dough and dust your work surface with some flour. Roll the dough out to about ¼ inch thick. Use a large round cookie cutter, about 4 inches wide, to cut out circles. You should get about twelve circles from the dough.
Adding Toppings and Creating Skull Features
Now, it’s time to make your skull shapes. Take a smaller round cutter, about 1 inch, and cut out two small eyes from each dough circle. Then, cut a larger triangle for the mouth. Keep the dough scraps for later. Place the skull-shaped dough on your baking sheets. Spread a tablespoon of pizza sauce on each base, leaving the cut-out areas clear. Sprinkle the mozzarella cheese on top. For fun, use olive slices for eyes and add pepperoni or bell peppers for the mouth.
Baking the Mini Skull Pizzas
Before baking, roll out the reserved dough scraps. Cut out fun shapes like bones and place them around your pizzas. Beat an egg in a bowl. Brush the edges of the pizzas with the egg wash. This gives them a nice golden color. Sprinkle garlic powder and dried oregano for flavor. Bake them in the oven for about 10-12 minutes. Look for a golden brown crust and bubbling cheese. Once done, let them cool for a few minutes before serving. Enjoy your spooky creations!
Tips & Tricks
Perfecting the Dough Thickness
To make great mini skull pizzas, you need the right dough thickness. Roll the dough to about ¼ inch thick. This allows the crust to cook well. If it’s too thin, it will burn. If it’s too thick, it won’t cook evenly. Use a rolling pin for a smooth finish. Dust your surface with flour to prevent sticking. This simple step makes a big difference in the final result.
Creative Presentation Ideas
Presentation can make your mini skull pizzas even more fun! Use a spooky platter to serve them. Add fresh basil leaves around the pizzas for color. You can also serve a side of marinara sauce for dipping. For extra flair, add Halloween decorations to your table. Think of plastic spiders or mini pumpkins. Get creative with your display to wow your guests!
Enhancing Flavor with Seasonings
Seasoning is key to tasty mini skull pizzas. I love using garlic powder and dried oregano. These spices add great flavor to the crust and sauce. You can also try adding red pepper flakes for a spicy kick. Use fresh herbs like basil or parsley for a bright flavor twist. Seasoning not only boosts taste but also makes the dish more appealing. Don’t skip this step!
Pro Tips
- Use a Pizza Stone: For an extra crispy crust, preheat a pizza stone in the oven. Transfer your mini skull pizzas onto the hot stone for baking.
- Customize Toppings: Get creative with your toppings! Use different cheeses or add veggies like mushrooms and spinach to suit your taste.
- Make Ahead: Prepare the skull cutouts and toppings in advance. Assemble and bake them just before serving for a fresh treat.
- Fun Shapes: Use cookie cutters to create fun shapes like bats or ghosts from the dough scraps for an extra festive touch.
Variations
Vegetarian and Vegan Options
You can easily make these mini skull pizzas vegetarian. Just skip the pepperoni. Use extra veggies like mushrooms, zucchini, or spinach. These add great taste and color. For a vegan version, swap the mozzarella for vegan cheese. There are many brands out there that melt well. You can also use a dairy-free egg wash. A mix of water and flour works well.
Different Cheese Choices
Mozzarella is classic for pizza, but feel free to mix it up. Try cheddar for a sharp flavor. Provolone adds a nice twist too. If you love blue cheese, use it sparingly for a bold taste. You could even try a blend of different cheeses for a gourmet touch. Just remember to melt well!
Themed Seasonal Variations
Make your mini skull pizzas fit any holiday. For Halloween, use black olives for spooky eyes. Add red sauce or black bean puree for a creepy effect. Around Christmas, you can shape the dough into holiday figures. Use green peppers for Christmas trees or red peppers for Santa hats. The options are endless, so let your creativity shine!
Storage Info
How to Store Leftover Mini Skull Pizzas
To store leftover mini skull pizzas, first let them cool completely. Place them in an airtight container. This keeps them fresh and stops them from getting soggy. You can also wrap them tightly in plastic wrap for extra protection. Store the pizzas in the fridge for up to three days.
Reheating Tips for Best Results
When you’re ready to eat leftover mini skull pizzas, reheating is key. The best way is to use an oven. Preheat your oven to 350°F (175°C). Place the pizzas on a baking sheet. Heat them for about 5 to 7 minutes. This makes the crust crispy and the cheese melty. You can also use a microwave, but the crust won’t stay as crispy.
Freezing for Future Enjoyment
If you want to save mini skull pizzas for later, freezing is a great option. Wrap each pizza in plastic wrap and then in aluminum foil. This helps keep them from getting freezer burn. You can freeze them for up to two months. When you’re ready to eat, thaw them in the fridge overnight. Then, reheat them in the oven for the best taste.
FAQs
How can I make mini skull pizzas without a cookie cutter?
You can easily make mini skull pizzas without a cookie cutter. First, use a large glass or bowl to cut out circles from the pizza dough. Then, shape the skull features by hand. For eyes, you can use a knife or any small round object to make small holes. For the mouth, just cut a triangle shape. This method allows for a more personal touch and makes the skulls unique!
Can I use store-bought pizza sauce?
Yes, you can definitely use store-bought pizza sauce. It saves time and still tastes great. Choose a sauce that you enjoy. Some sauces come with added herbs or spices, which can enhance the flavor of your mini skull pizzas. Just spread it on your dough, and you’re ready to add toppings!
What other themes work for mini skull pizzas?
You can create many fun themes with mini skull pizzas. Try using ghost shapes by cutting out circles and adding spooky toppings. You could also make pumpkin faces by using orange bell peppers for eyes and mouths. Seasonal themes like spiders or bats can add extra fun. Just let your imagination run wild!
Making mini skull pizzas is a fun and tasty adventure. We covered essential ingredients, helpful tools, and easy steps to create these spooky treats. I shared tips to improve dough and presentation and explored variations for everyone’s taste. Storage tips ensure you can enjoy them later, too.
In summary, trying new ideas makes cooking enjoyable. You now have everything to make delicious mini skull pizzas. Enjoy this fun project and bring smiles to your tabl