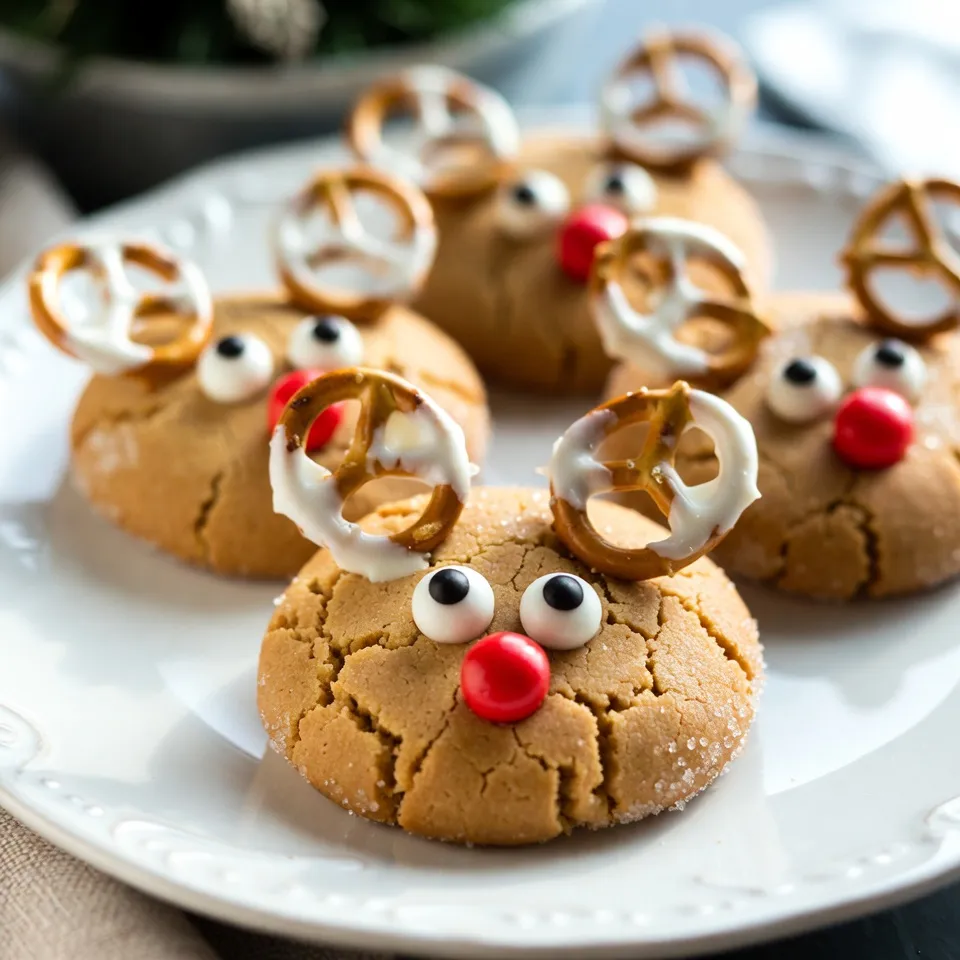
Bring joy to your holiday baking with my easy Reindeer Peanut Butter Cookies! These festive treats are simple to make and fun to decorate. You’ll love blending creamy peanut butter and chocolate chips to create cute reindeer faces perfect for family gatherings or gift-giving. Let’s dive into the ingredients and steps to whip up the cutest cookies this season! Trust me, your holiday will feel extra merry with these delightful goodies.
Why I Love This Recipe
- Festive Fun: These reindeer cookies bring a playful touch to any holiday gathering, making them a hit with both kids and adults.
- Easy to Make: With just a few simple ingredients and steps, these cookies are quick to whip up, perfect for last-minute holiday baking.
- Deliciously Decadent: The combination of creamy peanut butter and chocolate chips creates a rich, satisfying flavor that is hard to resist.
- Great for Gifting: Pack these cookies in a festive tin to share with friends and family, spreading cheer and deliciousness during the holidays!
Ingredients
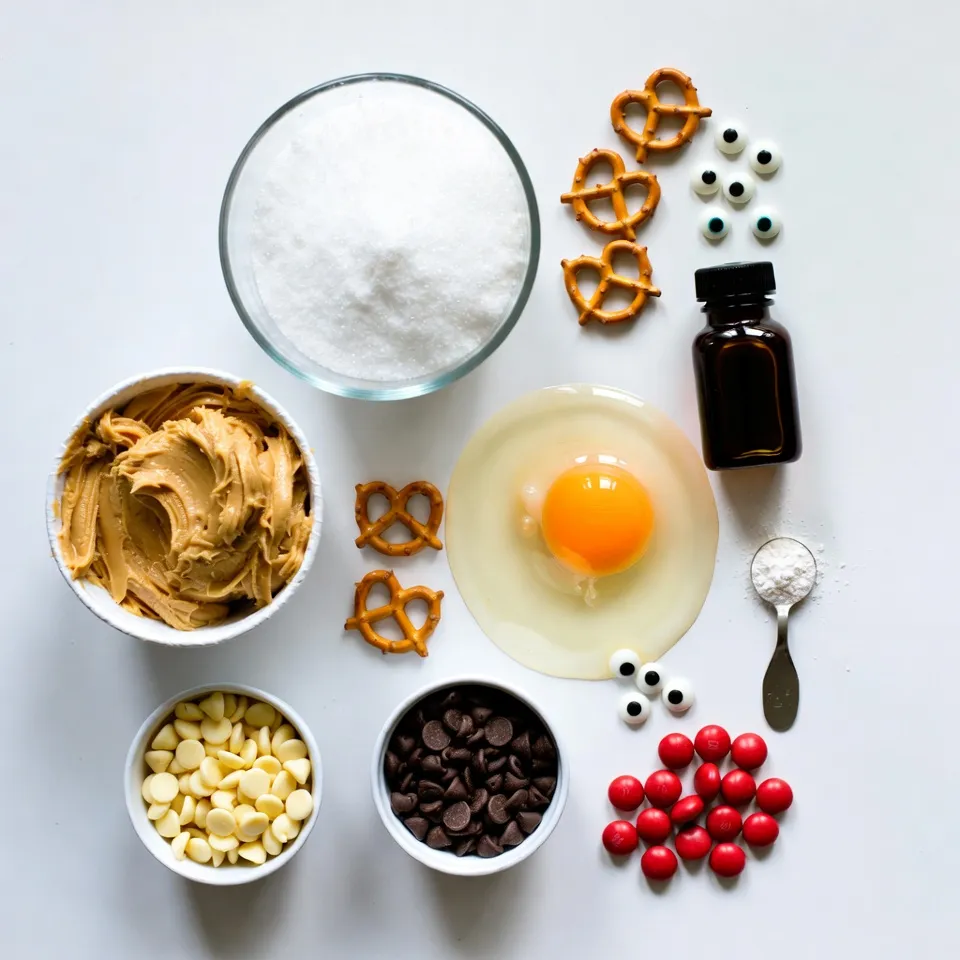
List of Ingredients
– 1 cup creamy peanut butter
– 1 cup sugar (plus extra for rolling)
– 1 large egg
– 1 teaspoon vanilla extract
– 1 teaspoon baking soda
– 1/2 cup mini chocolate chips
– 1/4 cup white chocolate chips (for decoration)
– 8 pretzel twists (for antlers)
– 16 candy eyes
– Red candy (like M&M’s or red gummies for noses)
These ingredients are simple yet key to making delightful reindeer peanut butter cookies. The creamy peanut butter adds a rich flavor and smooth texture. Sugar gives sweetness and helps with the cookie’s shape. The egg binds everything together, while vanilla adds a warm aroma. Baking soda helps the cookies rise slightly.
Mini chocolate chips bring extra sweetness and texture, and the white chocolate chips add a fun decorative touch. Pretzel twists create cute antlers, while candy eyes and red candies complete the festive look.
You can find most of these items in your pantry or at your local store. Be sure to have everything ready for a fun baking session!
Step-by-Step Instructions
Preparation Steps
– Preheat the oven to 350°F (175°C). Line a baking sheet with parchment paper.
– In a mixing bowl, combine 1 cup of creamy peanut butter, 1 cup of sugar, 1 large egg, 1 teaspoon of vanilla extract, and 1 teaspoon of baking soda. Mix well until smooth.
– Fold in 1/2 cup of mini chocolate chips until evenly mixed into the dough.
– Roll the dough into balls, about 1-inch in size. Roll them in extra sugar to coat. Place them on the baking sheet, spaced 2 inches apart.
– Use the back of a fork to gently press each ball down, making a crisscross pattern.
– Bake for 8-10 minutes until the edges are golden. Cookies will be soft but firm up as they cool.
– Let the cookies cool on the baking sheet for 5 minutes. Then, transfer them to a wire rack to cool completely.
Decorating Instructions
– Melt 1/4 cup of white chocolate chips in a microwave-safe bowl. Heat in 30-second intervals until smooth.
– Dip one end of each pretzel twist into the melted white chocolate. Press them gently into the top of each cookie for antlers.
– Use the remaining melted white chocolate to attach two candy eyes on each cookie. Place a red candy below the eyes for the nose.
– Let the chocolate set completely before serving or packaging.
Tips & Tricks
Baking Tips
To get the perfect cookie texture, mix the dough well. You want it smooth but not over-beaten. Bake until the edges turn golden, but keep the centers soft. This makes for a chewy cookie.
If you need an alternative to peanut butter, try almond butter or sunflower seed butter. Both add great flavor and work well in this recipe.
Adjusting sweetness is easy. If you like your cookies less sweet, use less sugar. You can also add a touch of salt to balance the sweetness.
Decorating Tips
For a festive look, use colorful candies. Swap out red candy for green or gold for a holiday twist. Mini marshmallows can also add a fun touch.
When it comes to using candies for decorations, get creative! Use chocolate kisses for noses or gumdrops for fun shapes. You can even use icing to draw fun faces.
Personalize each cookie by adding a special touch. Try different candies or sprinkles based on your favorite colors. This makes each cookie unique and fun!
Pro Tips
- Chill the Dough: For easier handling, chill the cookie dough for about 30 minutes before rolling into balls. This helps prevent spreading and results in thicker cookies.
- Use Fresh Ingredients: Ensure that your baking soda is fresh for the best rise and texture. Expired baking soda can lead to flat cookies.
- Decadent Chocolate: For a richer flavor, use high-quality peanut butter and chocolate chips. The taste will significantly enhance your cookies.
- Creative Decoration: Get creative with your cookie decorations! Use different colored candies for eyes and noses to make each reindeer unique and fun.
Variations
Ingredient Substitutions
When making reindeer peanut butter cookies, you can switch out some ingredients for better options.
– Gluten-free options: Use gluten-free flour instead of regular flour. This keeps your cookies soft while meeting gluten-free needs.
– Dairy-free alternatives: Replace regular chocolate chips with dairy-free ones. This way, everyone can enjoy the cookies.
– Using natural sweeteners: Try honey or maple syrup instead of sugar. This adds a nice flavor and can be healthier.
Holiday Themes
You can change the theme of your cookies for fun and cheer.
– Other animal-shaped cookie ideas: Make cookies in the shape of other animals like bears or bunnies. These shapes are fun for kids and add variety.
– Festive color schemes: Use green and red candies for Christmas or pastel colors for Easter. This makes your cookies look more festive.
– Tailoring for specific holidays: Add seasonal flavors like pumpkin spice for fall or peppermint for winter. This makes each batch special for the time of year.
Storage Info
Best Storage Practices
To keep your Reindeer Peanut Butter Cookies fresh, store them in an airtight container. This container keeps moisture out and helps the cookies stay soft. You can use a cookie jar or a plastic container with a tight lid. Make sure to place a piece of parchment paper between layers of cookies. This helps to prevent sticking.
For best results, store these cookies at room temperature. They will stay fresh for about a week. If you want them to last longer, consider freezing them.
Freezing Instructions
To freeze your baked cookies, first let them cool completely. Once cool, place the cookies in a single layer on a baking sheet. Freeze them for about one hour. This step helps to keep their shape. After freezing, transfer them to a freezer-safe bag. Remove as much air as possible before sealing.
When you’re ready to enjoy them, take out the number of cookies you want. Thaw them at room temperature for about 30 minutes. You can also warm them in the oven for a few minutes. This makes them taste fresh-baked again!
FAQs
Common Questions
How do I make my cookies softer or chewier?
To make your cookies softer, add an extra egg yolk. This helps create a chewy texture. You can also bake them for a shorter time. Keep an eye on them while baking. They should be soft when you take them out.
Can I prepare the dough in advance?
Yes! You can make the dough ahead of time. Just cover it and place it in the fridge. It can stay fresh for up to three days. When you’re ready to bake, roll it into balls and follow the rest of the steps.
What should I do if I don’t have candy eyes?
If you lack candy eyes, use mini chocolate chips instead. They make great eyes too! You can even use small pieces of dark chocolate. Your reindeer will still look cute and festive.
How long do these cookies last after baking?
These cookies can last for about one week. Store them in an airtight container. Keep them at room temperature. If you want them to last longer, you can freeze them. They freeze well for up to three months. Just thaw before serving.
These cookies are easy to make and fun to decorate. You need simple ingredients like peanut butter, sugar, and chocolate chips. The steps are straightforward, from mixing to baking. I shared tips to perfect your cookies and variations to suit your taste. Plus, I covered storage and even answered some common questions.
Now, you can enjoy these treats anytime. Share them at gatherings or keep them for yourself. Get creative with decorations and flavors. Happy bakin