Get ready to indulge in a treat that melts in your mouth! In this post, I’m sharing my easy recipe for salted caramel truffles. With just a few simple ingredients, you can create a rich and creamy dessert that impresses everyone. Whether you’re a novice or a seasoned cook, these truffles are perfect for any occasion. So, grab your apron and let’s dive into the sweet world of salted caramel goodness!
Why I Love This Recipe
- Decadent Flavor: The combination of rich dark chocolate and buttery caramel creates an indulgent treat that is hard to resist.
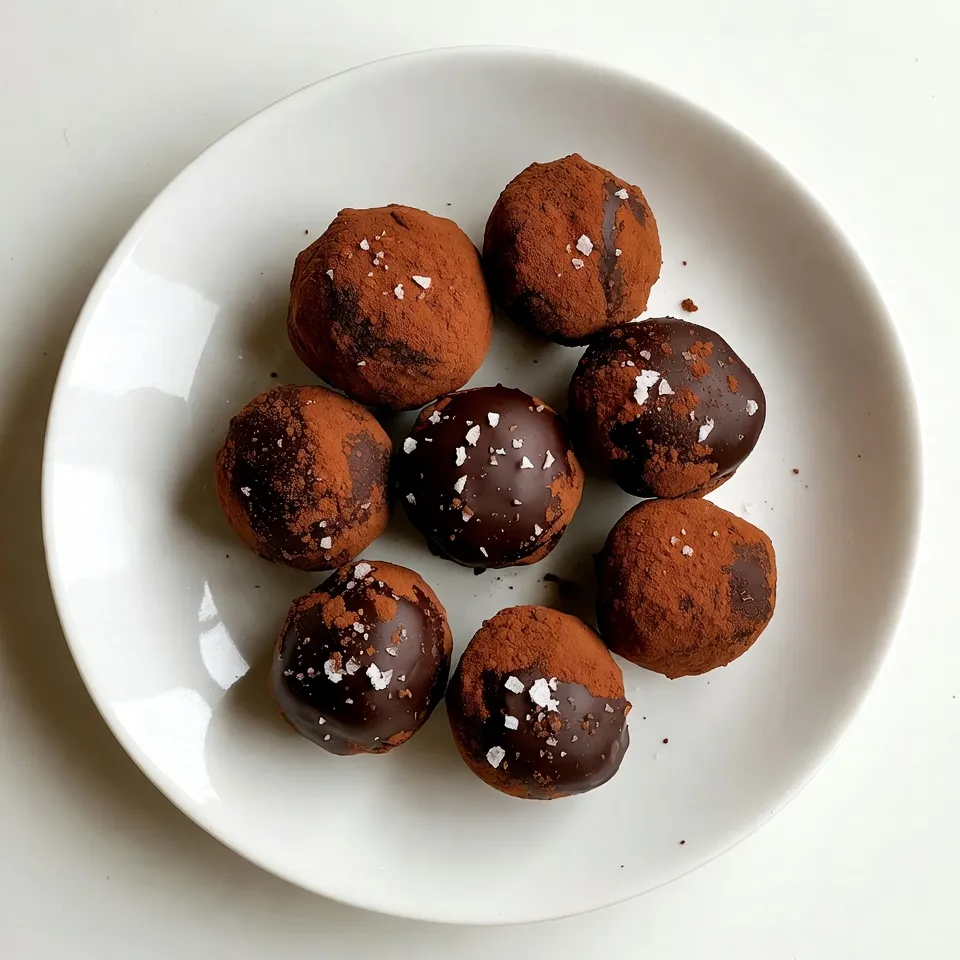
- Customizable Coating: You can roll these truffles in cocoa powder or crushed nuts, allowing for a personalized touch that suits your taste.
- Perfect for Gifting: These truffles make a delightful gift for friends and family, packed beautifully in a box or jar.
- Easy Preparation: With simple ingredients and straightforward steps, making these truffles is a breeze, even for novice bakers.
Ingredients
To make your salted caramel truffles, gather these simple ingredients:
– 1 cup heavy cream
– 1 cup dark chocolate chips (70% cocoa)
– 1/2 cup granulated sugar
– 1/2 cup unsalted butter, cubed
– 1 teaspoon sea salt (plus extra for garnish)
– 1 teaspoon vanilla extract
– 1/2 cup cocoa powder or crushed nuts (for coating)
Each ingredient plays a key role in creating rich, creamy truffles. The dark chocolate gives a deep flavor, while the heavy cream adds smoothness. Granulated sugar and butter create a luscious caramel. Sea salt enhances the sweetness, and vanilla brings warmth. Finally, the cocoa powder or nuts provide texture and a beautiful finish.
Feel free to mix and match the coatings to suit your taste. Enjoy the process of gathering these ingredients, as they will lead you to a delightful treat!

Step-by-Step Instructions
Prepping the Caramel
To start, combine 1/2 cup of granulated sugar and 1/4 cup of water in a medium saucepan. Stir gently until the sugar dissolves. This step is crucial as it sets the base for your caramel. Now, allow the mixture to cook without stirring. Keep a close eye on it! You want it to turn a deep amber color, which should take about 8-10 minutes. If it gets too dark, it will burn.
Mixing Caramel and Chocolate
Once your caramel is ready, remove it from the heat. Carefully add 1/2 cup of cubed unsalted butter. The mixture will bubble up, so watch out! Stir until the butter melts completely. Next, slowly pour in 1 cup of heavy cream while stirring continuously. This will create a smooth and rich caramel. Then, add 1 teaspoon of sea salt and 1 teaspoon of vanilla extract. Mix well until everything is combined.
Now, pour the caramel mixture over 1 cup of dark chocolate chips in a heatproof bowl. Let it sit for about 5 minutes. This waiting time allows the chocolate to melt. After that, stir the mixture until it is smooth and well blended.
Forming the Truffles
Once you have your beautiful mixture, cover the bowl with plastic wrap and refrigerate for about 2 hours. You want the mixture to be firm enough to scoop. After chilling, use a small cookie scoop or your hands to form the mixture into balls, about 1 inch in diameter.
Next, roll each truffle in either cocoa powder or crushed nuts for a tasty coating. Place them on a parchment-lined baking sheet. Finally, sprinkle each truffle with a pinch of sea salt. This little touch enhances the flavor. Store your truffles in an airtight container in the fridge until you’re ready to enjoy!
Tips & Tricks
Perfecting Your Truffles
To make great truffles, watch the sugar closely. When cooking, avoid burning the sugar. It should turn a nice amber color. This takes about 8 to 10 minutes. If you burn it, you will lose that sweet flavor.
Next, ensure an even coating for your truffles. When you roll them, you can use cocoa powder or crushed nuts. Both add flavor and texture. Make sure to coat them evenly for the best look and taste.
Serving Suggestions
Pair your salted caramel truffles with coffee or dessert. The rich truffle taste goes well with a hot cup of coffee. You can also serve them with cakes or pies for a sweet treat.
For gatherings, think about how you present your truffles. Use a nice plate or a clear jar. You can even sprinkle extra sea salt on top for a fancy touch. This adds a pop of flavor and makes them look great.
Pro Tips
- Use a Candy Thermometer: This will help you achieve the perfect caramel temperature, ensuring it reaches the right consistency without burning.
- Let the Caramel Cool: Allow the caramel to cool slightly before mixing with the chocolate to prevent it from seizing up.
- Experiment with Coatings: Try different coatings like chopped nuts, sprinkles, or toasted coconut for a unique twist on your truffles.
- Room Temperature for Serving: Let the truffles sit at room temperature for about 15 minutes before serving to enhance their flavor and texture.
Variations
Flavor Variations
You can easily change the flavor of these truffles. Adding different extracts is fun. For a nutty taste, try almond extract. If you want a fresh twist, add peppermint extract. You can also infuse spices into the caramel. A pinch of cinnamon adds warmth. Nutmeg can give a cozy feel, too. Experiment with flavors to find your favorite!
Coating Options
Coating your truffles can change their look and taste. Instead of cocoa powder, use white chocolate for a sweet touch. You can also use colored cocoa powder for a festive vibe. Rolling them in coconut gives a tropical flair. Crushed cookies can add crunch and flavor. Try different coatings for variety and fun!
Storage Info
Best Storage Methods
To keep your salted caramel truffles fresh, store them in an airtight container. This helps to maintain their rich flavor and soft texture. I recommend using a glass or plastic container with a tight lid. Avoid metal containers, as they can alter the taste.
Refrigeration is key. Keep the container in the fridge until you’re ready to enjoy them. If you have extra truffles, use parchment paper between layers to prevent sticking.
Shelf Life
Salted caramel truffles last about two weeks in the fridge. The cool air helps them stay firm and tasty. If you want to keep them longer, consider freezing them.
For freezing, place the truffles in a single layer on a baking sheet. Freeze them for about an hour, then transfer to an airtight container. They can last up to three months in the freezer. Just thaw them in the fridge before enjoying again.
FAQs
How do I make salted caramel truffles from scratch?
To make salted caramel truffles from scratch, you need simple ingredients and steps. Start by making the caramel. Combine granulated sugar and water in a saucepan. Heat until the sugar dissolves, then let it cook until it turns amber. Remove it from heat and add unsalted butter. After that, pour in heavy cream while stirring. Mix in sea salt and vanilla extract.
Next, pour this caramel over dark chocolate chips in a bowl. Let it sit for five minutes to melt the chocolate. Stir until smooth. Cover the bowl and chill the mixture for two hours. Once firm, scoop out small balls and roll them in cocoa powder or crushed nuts. Sprinkle sea salt on top for extra flavor.
Can I use milk chocolate instead of dark?
Yes, you can use milk chocolate instead of dark chocolate. Milk chocolate will make your truffles sweeter and creamier. Keep in mind that the flavor might change. Dark chocolate has a richer taste that balances the salted caramel. If you like a sweeter truffle, milk chocolate works great.
What is the best way to gift homemade truffles?
To gift homemade truffles, present them in a nice box or jar. You can line the box with parchment paper for a nice touch. Add a ribbon or tag to make it special. Make sure to keep them cool so they stay fresh. This way, your gift looks pretty and tastes great!
Where can I buy high-quality salted caramel truffles?
You can find high-quality salted caramel truffles at gourmet chocolate shops or online. Many local bakeries also offer homemade truffles. When shopping, check the ingredients to ensure quality. Look for shops that use real chocolate and fresh ingredients. This way, you’ll enjoy the best flavors and textures!
You learned how to make salted caramel truffles from scratch. We covered key ingredients and step-by-step instructions. You now know tips to avoid common pitfalls and ways to present your truffles. Plus, we explored flavor and coating variations to keep things fun.
In closing, making these truffles is easy and rewarding. Enjoy sharing them or treating yourself. Happy cookin