If you’re looking for a fun and tasty party dish, look no further! My Savory Seven Layer Taco Dip is easy to make and always a hit. This colorful dip layers rich flavors and fresh ingredients, making it perfect for gatherings. In this post, I’ll guide you through every step, from prep to serving. Ready to impress your guests? Let’s dive into the deliciousness of this simple favorite!
Why I Love This Recipe
- Colorful Presentation: This dip is not only delicious but also visually stunning with its vibrant layers.
- Easy to Customize: You can easily swap ingredients based on your preferences, making it versatile for any occasion.
- Perfect for Sharing: With its generous portions, this dip is ideal for parties and gatherings, encouraging everyone to dig in.
- Quick to Prepare: With only 20 minutes of prep time, you can whip this up quickly for unexpected guests.
Ingredients
Required Ingredients for Seven Layer Taco Dip
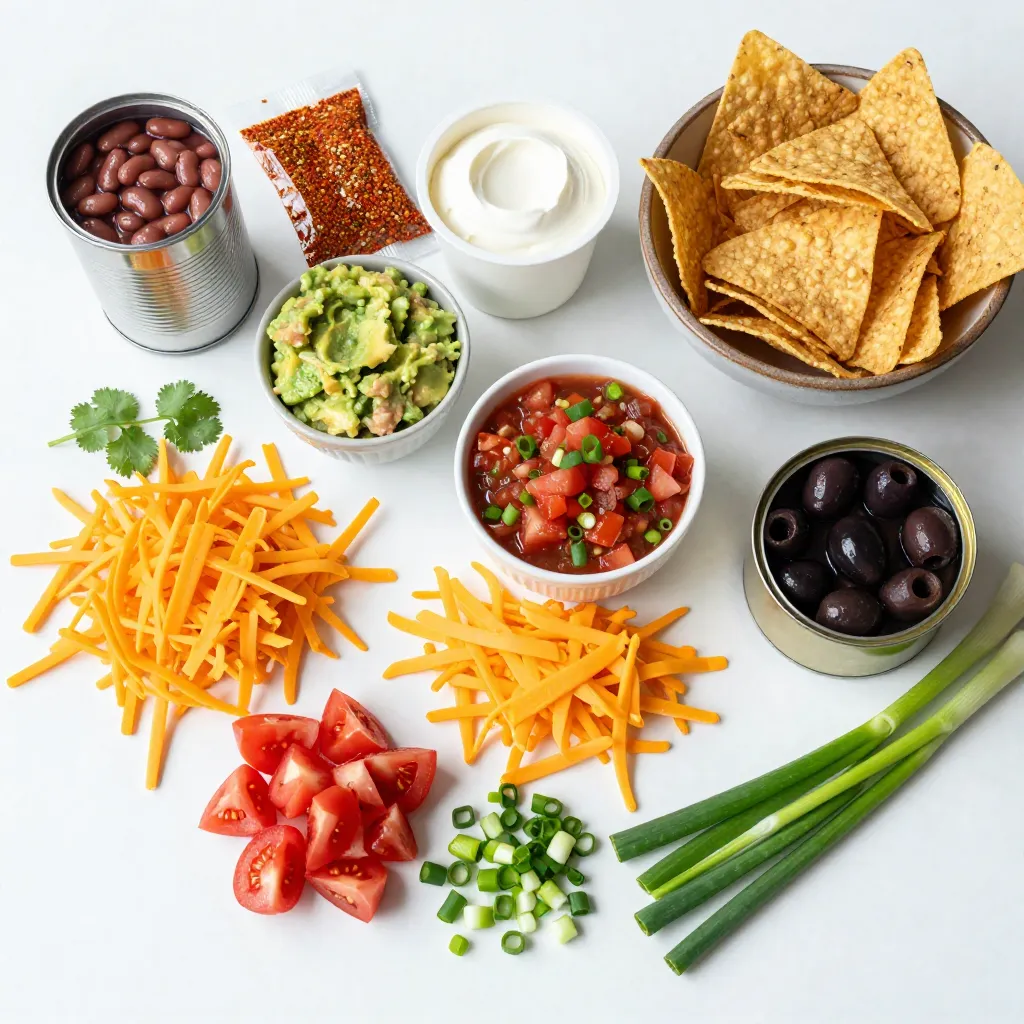
To make this tasty dip, you need a few key items. Here’s what you will need:
– 1 can (16 oz) refried beans
– 1 packet taco seasoning
– 1 cup sour cream
– 1 cup guacamole
– 1 cup fresh salsa (chunky)
– 1 cup shredded cheddar cheese
– 1 can (2.25 oz) sliced black olives, drained
– 1 cup diced tomatoes
– 1/2 cup finely chopped green onions
– Tortilla chips for serving
Optional Garnishes and Add-Ons
You can make your dip even better with some fun toppings. Here are some great options:
– Fresh cilantro for garnish
– Jalapeños for heat
– Diced avocado for creaminess
– Chopped bell peppers for crunch
Ingredient Substitutions
If you need to swap out any ingredients, I have some suggestions:
– Use Greek yogurt instead of sour cream for a healthier option.
– Try bean dip instead of refried beans for a different texture.
– Pick your favorite cheese, like Monterey Jack, if you want to mix it up.
– Substitute fresh salsa with jarred salsa if you’re short on time.
These ingredients create layers of flavor and texture, making this dip a crowd-pleaser. Enjoy your cooking!
Step-by-Step Instructions
Preparing the Base Layer
First, grab a medium bowl. Add one can of refried beans. Then, sprinkle in one packet of taco seasoning. Mix them well until combined. This will create a tasty base for your dip. Next, take a large, shallow serving dish. Spread the seasoned beans evenly across the bottom. Use a spatula to smooth it out. This layer sets the stage for all the rest.
Layering the Dip
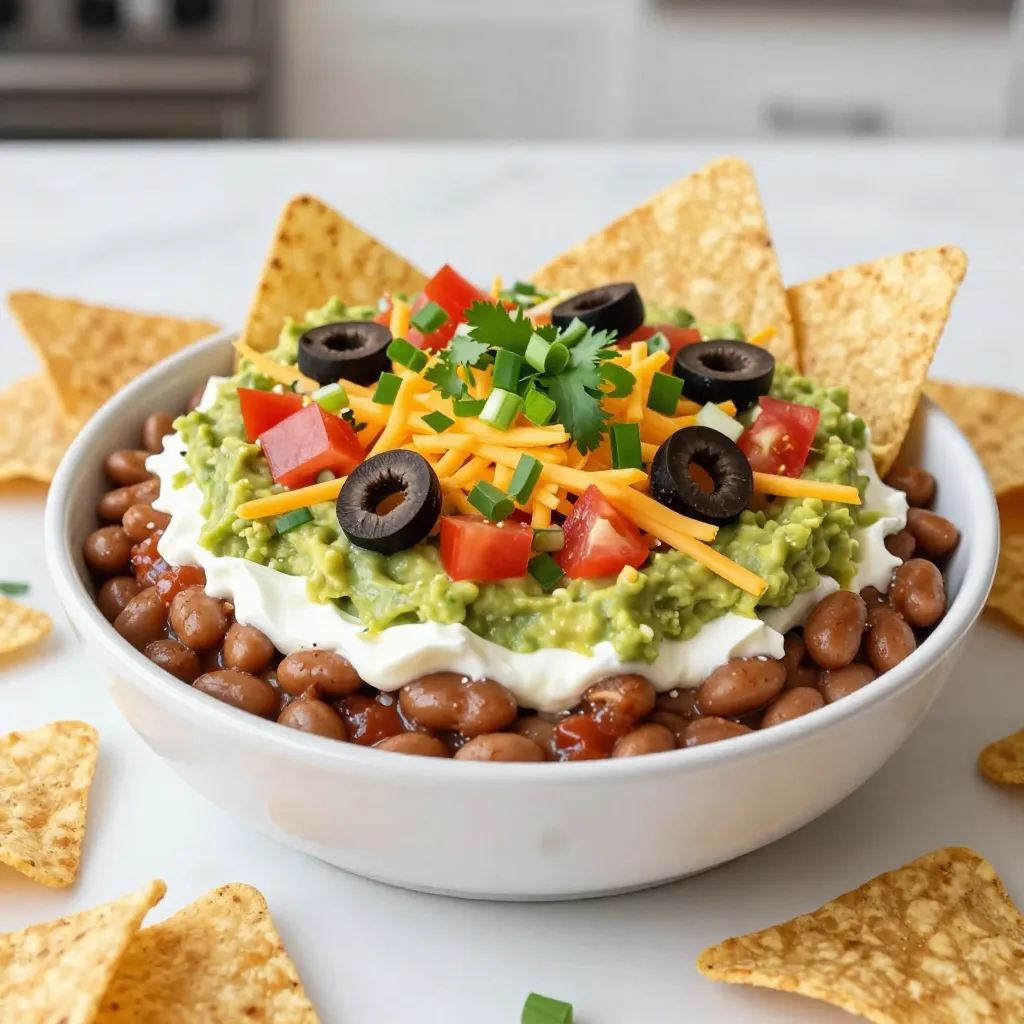
Now it’s time for the fun part—layering! Start with one cup of sour cream. Spread this over the beans. Make sure to cover every inch. Next, take one cup of guacamole. Carefully spread it over the sour cream. Keep it neat for a pretty look. Then, grab one cup of fresh salsa. Spoon it over the guacamole. Try not to mix the layers yet.
Now, sprinkle one cup of shredded cheddar cheese over the salsa. Cover the whole surface. After that, add a layer of sliced black olives from a can. Then, layer on one cup of diced tomatoes. Finish this section with ½ cup of finely chopped green onions. Each layer adds flavor and texture.
Final Touches and Serving
For a pop of green, add fresh cilantro on top if you like. This is optional but adds a nice touch. Serve your dip right away with tortilla chips on the side. You can enjoy this dip cold, and it tastes great with the crunchy chips. Each bite gives you a burst of flavor. Don’t forget to have fun while sharing this crowd-pleaser at your next party!
Tips & Tricks
Best Practices for Layering
When you layer your dip, keep each layer neat. Neat layers look great and taste better. Start with refried beans as your base. Spread them evenly in the bottom of your dish. Next, add sour cream. Use a spatula to spread it smoothly. Then, do the same with guacamole, salsa, cheese, olives, tomatoes, and green onions. Each layer should be visible. This makes your dip more appealing.
Common Mistakes to Avoid
Don’t rush the layering process. If you rush, layers can mix, making a mess. Use a clean spatula for each layer. This helps keep flavors separate and fresh. Avoid using too much liquid salsa. Too much can make the dip soggy. Instead, choose a chunky salsa for better structure. Lastly, don’t forget to drain the black olives. This keeps the dip from getting watery.
How to Enhance Flavor
To boost flavor, choose high-quality ingredients. Fresh ingredients make a big difference. Try adding jalapeños for heat or corn for sweetness. You can mix lime juice into the guacamole for zest. If you want more depth, sprinkle taco seasoning between layers. Fresh cilantro adds a nice touch as a garnish. It brightens the dish and adds freshness. Enjoy your dip with crispy tortilla chips for the perfect crunch!
Pro Tips
- Layer with Care: Ensure each layer is spread evenly and carefully to maintain a beautiful presentation.
- Fresh Ingredients Matter: Use fresh salsa and ripe avocados for the best flavor and texture in your dip.
- Chill Before Serving: Let the dip chill in the refrigerator for about 30 minutes before serving to enhance the flavors.
- Customize Your Layers: Feel free to add additional layers like corn, jalapeños, or different types of cheese for a personal touch.
Variations
Vegetarian Options
You can easily make a vegetarian version of Seven Layer Taco Dip. Instead of refried beans, use black beans or pinto beans. Mash them for a creamy texture. Add more veggies like corn or bell peppers for extra crunch. You can also swap the sour cream with a plant-based yogurt.
Different Flavor Profiles
Want to mix things up? Try adding different spices. A sprinkle of cumin or chili powder can elevate the flavor. You might also consider using spicy salsa or adding jalapeños for heat. Experiment with different cheeses, like pepper jack, for a zesty kick.
Dietary Modifications (Gluten-Free, Low-Calorie)
For a gluten-free dip, ensure your taco seasoning is gluten-free. You can use fresh veggies instead of chips for a low-calorie option. To make it lighter, replace sour cream with Greek yogurt. This keeps the creaminess but cuts down on calories.
Storage Info
How to Store Leftovers
To store leftovers, first cover the dip tightly with plastic wrap. You can also use an airtight container. Make sure to press the wrap against the dip to keep air out. This helps keep the layers fresh. Place it in the fridge right away. Enjoy it within three days for the best taste.
Reheating Instructions
Reheating Seven Layer Taco Dip usually isn’t needed. It’s best served cold. If you prefer it warm, you can heat it gently in the oven. Set the oven to 350°F. Place the dip in an oven-safe dish. Heat for about 10-15 minutes. Keep an eye on it to avoid overcooking.
Best Practices for Freshness
To keep your dip fresh, layer ingredients wisely. Avoid mixing layers when serving. This helps each layer stay intact. If you make the dip ahead, add fresh toppings like tomatoes and onions just before serving. Store the dip in a cool area if it’s a warm day. Always keep it chilled when not being served.
FAQs
Can I make Seven Layer Taco Dip ahead of time?
Yes, you can make Seven Layer Taco Dip ahead of time. This dip tastes even better when it sits for a while. Just layer it in your dish and cover it with plastic wrap. Store it in the fridge for up to 24 hours before serving. This way, the flavors blend well.
What can I serve with Seven Layer Taco Dip?
You can serve Seven Layer Taco Dip with a variety of dippers. Tortilla chips are the classic choice. You can also use fresh veggies, like carrot sticks or cucumber slices. If you want something different, try pita chips or even crackers. These options add crunch and complement the dip.
How long does Seven Layer Taco Dip last in the fridge?
Seven Layer Taco Dip can last about 3 to 4 days in the fridge. Make sure to cover it tightly to keep it fresh. If you see any changes in color or smell, it’s best to throw it out. Always check for freshness before enjoying leftovers.
This blog post covered everything you need to make Seven Layer Taco Dip. We talked about required ingredients, tasty garnishes, and swaps you can make. You learned step-by-step how to prep, layer, and serve this dip. Plus, I shared tips to avoid mistakes and enhance flavors. We explored fun variations for everyone and storage tips for leftovers.
In the end, this dip is versatile and easy to love. Enjoy making it your wa