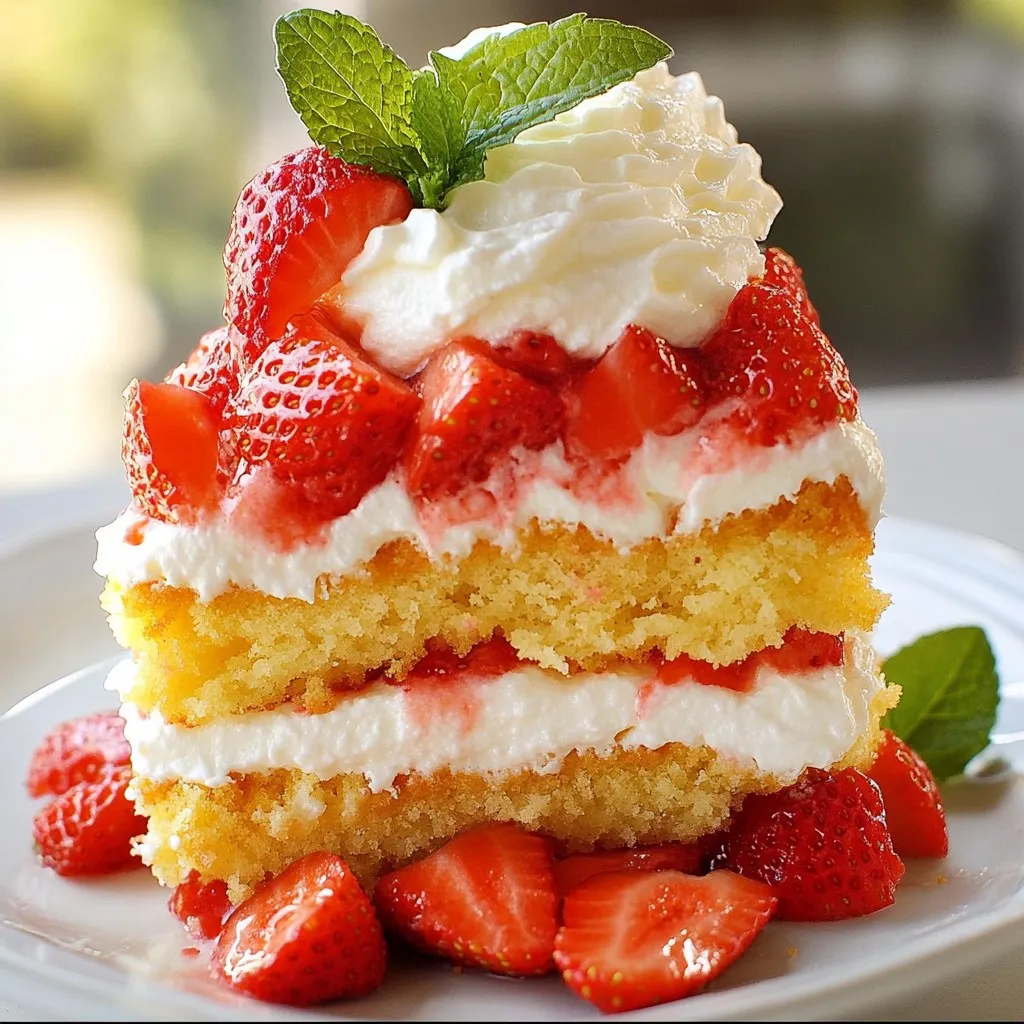
Are you ready to make a delicious dessert that impresses everyone? This Strawberry Shortcake Cake is a delightful treat that’s easy to whip up! With fresh strawberries and fluffy whipped cream, it’s perfect for any occasion. I’ll guide you step-by-step through the process, sharing tips to ensure your cake turns out just right. Let’s dive in and create a sweet masterpiece that everyone will love!
Why I Love This Recipe
- Fresh Strawberries: The use of fresh strawberries in this recipe elevates the flavor, making each bite a burst of sweetness and juiciness.
- Light and Fluffy Cake: The cake’s texture is incredibly light and fluffy, thanks to the perfect balance of ingredients, making it a delightful treat.
- Whipped Cream Delight: The homemade whipped cream adds a creamy richness that complements the strawberries beautifully, creating a perfect harmony of flavors.
- Beautiful Presentation: This cake not only tastes amazing but also looks stunning, making it an impressive centerpiece for any gathering.
Ingredients
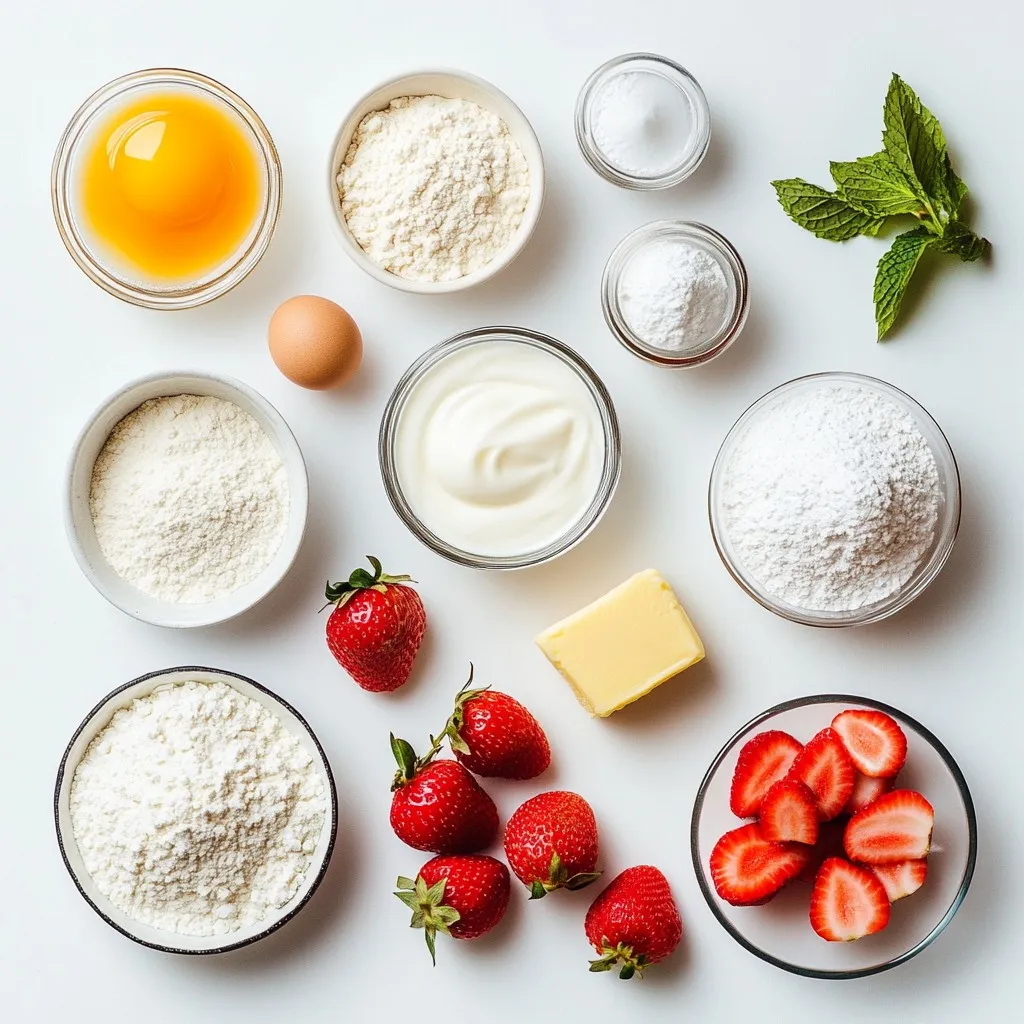
Let’s gather everything you need for this delightful strawberry shortcake cake. Here’s the complete list of ingredients:
– 2 cups all-purpose flour
– 2 tsp baking powder
– ½ tsp baking soda
– ½ tsp salt
– ½ cup unsalted butter, softened
– 1 cup granulated sugar
– 2 large eggs
– 1 tsp vanilla extract
– ¾ cup buttermilk
– 2 cups fresh strawberries, hulled and sliced
– 1 cup heavy cream
– 3 tbsp powdered sugar
– 1 tsp vanilla extract (for whipped cream)
– Fresh mint leaves for garnish (optional)
These ingredients work together to create layers of flavor. The fresh strawberries add a sweet touch, while the cream brings richness. Each bite is a taste of summer. You can adjust the sugar based on your taste. If you like it sweeter, add a little more. Enjoy the process of gathering these ingredients; it’s all part of the fun!
Step-by-Step Instructions
Prepping the Oven and Cake Pans
First, preheat your oven to 350°F (175°C). This step is key for even baking. While the oven heats, take two 9-inch round cake pans. Grease them well with unsalted butter. Then, sprinkle flour inside. This helps the cake come out easily after baking.
Mixing Dry Ingredients
In a medium bowl, add 2 cups of all-purpose flour. Then, mix in 2 teaspoons of baking powder, ½ teaspoon of baking soda, and ½ teaspoon of salt. Whisk these dry ingredients well until they blend completely. This mix helps the cake rise nicely.
Creaming Butter and Sugar
In a large mixing bowl, add ½ cup of softened unsalted butter and 1 cup of granulated sugar. Use an electric mixer to cream these together. Mix for about 3 to 5 minutes. The goal is to make the mixture light and fluffy. This step is very important for a soft cake.
Incorporating Eggs and Vanilla
Now, add 2 large eggs to the bowl. Add them one at a time. Make sure to mix well after each egg. Then, stir in 1 teaspoon of vanilla extract. This adds great flavor to your cake.
Combining Dry Ingredients and Buttermilk
Next, take the bowl with dry ingredients. Gradually mix this into the butter and egg mixture. Alternate adding ¾ cup of buttermilk. Start and end with the dry mix. Only mix until everything is just combined. This keeps the cake light and airy.
Baking and Cooling
Divide the batter evenly into your prepared pans. Smooth the tops with a spatula. Bake in the oven for 25 to 30 minutes. To check for doneness, insert a toothpick in the center. If it comes out clean, your cakes are ready. Let them cool in the pans for about 10 minutes. Then, transfer them to wire racks to cool completely. This step prevents sogginess.
Strawberry Filling Preparation
While the cakes cool, prepare your strawberry filling. Take 2 cups of hulled and sliced strawberries. In a bowl, mix them with 2 tablespoons of granulated sugar. Let them sit for about 15 minutes. This process is called macerating, and it brings out the strawberries’ natural juices.
Making Whipped Cream
For the whipped cream, take 1 cup of heavy cream in a mixing bowl. Use an electric mixer to beat the cream until soft peaks form. Gradually add in 3 tablespoons of powdered sugar and 1 teaspoon of vanilla extract. Continue beating until stiff peaks form. This will give you a light and fluffy whipped cream.
Assembling the Cake
Once the cakes are cool, place one layer on a serving plate. Spread a layer of whipped cream on top. Add half of your macerated strawberries next. Carefully place the second cake layer on top. Spread more whipped cream over this layer. Top it with the remaining strawberries and a dollop of whipped cream. If you wish, add fresh mint leaves for garnish.
Tips & Tricks
Perfecting the Cake Texture
To avoid a dry cake, start by measuring your flour correctly. Use the spoon-and-level method. Scoop flour into your measuring cup with a spoon, then level it off with a knife. This way, you won’t pack too much flour. Also, make sure not to overmix your batter. Mix just until combined. This keeps the cake light and fluffy. Lastly, check the cake early. If a toothpick comes out clean, take it out of the oven. Overbaking leads to dryness.
Decorating Ideas
For a stunning presentation, think about layering fresh strawberries on top. You can also sprinkle some powdered sugar over the cake for a touch of sweetness. Use a piping bag to create swirls of whipped cream around the edges. Add mint leaves for color and freshness. Try to slice the cake into wedges and serve each piece with a small bowl of extra strawberries and whipped cream. This makes it fun for guests!
Serving Suggestions
Serve your strawberry shortcake cake with a scoop of vanilla ice cream for a rich treat. A dollop of whipped cream on each slice adds creaminess. Pair it with a refreshing mint tea or lemonade. Both drinks balance the sweetness of the cake. For a light touch, serve with a side of extra fresh strawberries. Enjoying this cake with friends and family makes it even better!
Pro Tips
- Use Fresh Strawberries: Always opt for ripe, fresh strawberries for the best flavor and texture in your shortcake.
- Chill Your Whipping Cream: Ensure your heavy cream and mixing bowl are chilled before whipping; this helps achieve better volume and stability.
- Layering Technique: When stacking the cake layers, use a serrated knife to level them if they have domed tops for a perfect finish.
- Make Ahead: You can prepare the cake layers a day in advance and store them tightly wrapped in plastic wrap to save time.
Variations
Gluten-Free Strawberry Shortcake Cake
To make a gluten-free version, swap the all-purpose flour for gluten-free flour. You can use a blend that includes rice flour, potato starch, and tapioca flour. Adjust the baking powder to ensure it is gluten-free. Follow the same steps for mixing and baking. The texture may be slightly different, but it will still taste great!
Alternate Fruit Options
You can change the fruit to suit your taste. Try using blueberries, raspberries, or peaches. Each fruit adds a new flavor twist. Just make sure to adjust the sugar based on the fruit’s sweetness. For example, peaches may need a bit more sugar to balance their tartness.
Vegan Adaptations
To create a vegan shortcake cake, replace the eggs with flax eggs. Mix one tablespoon of ground flaxseed with three tablespoons of water. Let it sit for about five minutes to thicken. Use plant-based butter instead of regular butter. For the buttermilk, mix almond milk with a splash of lemon juice. This will keep the cake moist and tasty!
Storage Info
Storing Leftovers
To keep your strawberry shortcake cake fresh, store it in the fridge. Use an airtight container or cover it tightly with plastic wrap. This helps prevent the cake from drying out. If you want to freeze it, slice the cake first. Wrap each slice in plastic wrap, then place them in a freezer bag. This makes it easy to enjoy a piece later.
Shelf Life
The cake stays fresh for about 3-4 days in the fridge. If you freeze it, it can last for up to 3 months. When ready to eat, thaw the cake in the fridge overnight. This keeps it moist and delicious. Enjoy your strawberry shortcake cake without worry!
FAQs
Can I use frozen strawberries?
Yes, you can use frozen strawberries. They work well, but there are some things to keep in mind. First, thaw the strawberries and drain any extra liquid. This keeps your cake from getting soggy. Also, frozen strawberries may not have the same fresh taste. If you can, use fresh strawberries for the best flavor.
What is the best way to slice the cake?
To slice the cake without tearing, use a sharp knife. Warm the knife slightly in hot water, then dry it. This helps the knife glide through the soft layers. Cut straight down, not sawing back and forth. This keeps the layers neat and pretty for serving.
How do I make it ahead of time?
You can make the cake layers ahead of time. Bake and cool them, then wrap them in plastic wrap. Store them in the fridge for up to two days. For the strawberries, you can prepare them a day early too. Just mix them with sugar and keep them in the fridge. Make the whipped cream right before serving for the best texture.
In this post, we explored how to make a delightful strawberry shortcake. We covered the key ingredients, including fresh strawberries and whipped cream. I provided clear steps for baking, assembling, and decorating your cake to perfection. With tips on texture and variations, you’ll impress anyone you serve. Remember, the right storage keeps it fresh. Whether you choose gluten-free or vegan options, you can customize your cake for any occasion. Now, gather your ingredients and create a treat that brings joy to every bite. Happy bakin